Me: Look! My parcel is all pretty and French-looking!
Jon: It's a brown paper packet.
Me: Exactly!
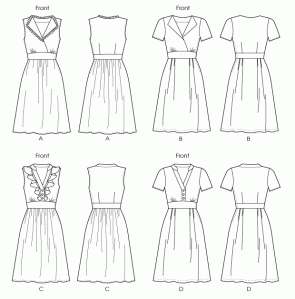
I am actually pretty excited about the contents of my parcel too - my first patterns from Deer & Doe. Now I just have to stop my hands from hurting, finish my half-made Colette patterns and then I can get started...
Saturday, June 22, 2013
Friday, June 14, 2013
Silk Mitts
A couple of weeks ago I finished off these C18th/Regency silk mitts. I've been collecting pictures of late eighteenth century mitts on Pinterest for a while so I decided to make some up before this year's Jane Austen Festival in April. They were mostly finished for the event so I wore them but I didn't get around to doing the embroidery until the end of May.
I love my mitts! They're much prettier and more practical than gloves - good for sewing workshops when you want to be able to use your fingers. Most mitts in museums are dated late eighteenth century so they go with my Ikea dress but apparently they continued to be worn in the Regency period, so that suits me well! I think there will be more mitts in my future.
I used this pattern. I found it on Pinterest, I'm not sure where it's from but I just printed it out full size (cut in half on two A4 sheets). I was going to use the one in Costume Close Up but printing this one seemed easier than scanning, resizing, etc. I just made them the original size from the image. The calico one I did to test the pattern fit me really well but the silk I used for the real ones was stiffer so they're a little bit snug - the side seam on the right hand one is almost pulling through, so next time I need to use a bigger seam allowance.
I used some silk dupion from my stash. The main fabric is an odd blue/yellow-green shot mix that I've never known what to do with but the colour looks nice in this. I lined the points with gold silk dupion. I think I'll make a matching reticule at some point. Silk taffeta or satin would be more accurate but this was the first pair I tried and I wanted to use something I already had. I think I'll make another pair in satin or taffeta soon, with a bigger seam allowance so they don't break! A lot of extant mitts also seem to be lined (often with leather) so maybe I'll add a lining in the future. I thought I could add it to these ones at some point but not if they're already tight!
I stitched the side seam and the point by machine but everything else is done by hand. For the hems I used a tiny spaced backstitch and used threads pulled from the leftover fabric, which I'm quite proud of. I embroidered the lines on the back of the hand with blue silk thread, using herringbone stitch and chain stitch. Many mitts also have herringbone stitch around the thumb and point so I may do that at some point but I shouldn't be doing more embroidery than I have to at the moment, with my hands/arms still being sore. Sigh.

Thursday, May 2, 2013
New Blog
I decided to start a new blog for a couple of reasons:
At the moment I'm happy with blogspot except for one thing: Occasionally the title loads in Comic Sans instead of pretty curly font. And then the whole thing seems futile.
- Blogspot seems more popular among historical costumers so I thought it might make it easier to follow people
- It's attached to google accounts, which I use (I keep losing the password for Wordpress)
- I was feeling dissatisfied with the name of my blog (especially that the title and address were different)
- Setting up the new one seemed like a useful way to procrastinate from doing anything important.
Sadly I still felt uninspired about titles. How do people do these things? So I'm not sure which one I'll keep using, but for now I've copied the posts that are reasonably recent and non-pointless. The old one is here: http://melegance.wordpress.com/
At the moment I'm happy with blogspot except for one thing: Occasionally the title loads in Comic Sans instead of pretty curly font. And then the whole thing seems futile.
Owls!
This post was originally published on 10 September 2012
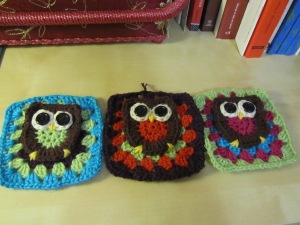
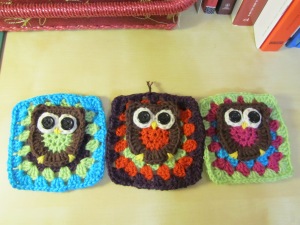
I've done 3 of my planned 5 crochet owls. They're so cute!
Cross-Stitch
This post was originally published on 9 September 2012
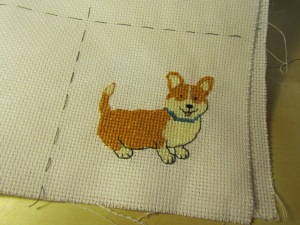
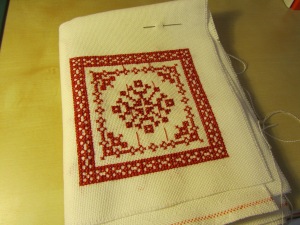
I just finished a cross stitch project! I'm pretty pleased with how it came out. I saw an ad for a pattern in Cross Stitcher magazine for corgis but I couldn't get the right edition, so I was so glad when I found out the pattern was on their website! It is SO CUTE. The original pattern didn't have a tail though, and since I'm making this for my grandma and her corgi/jack russell has a very character-filled tail I had to add one on. I was worried about doing that so I didn't work on it for a while, but I just put the tail on and I think it came out pretty well. I'm not 100% sure about the outlining since it was meant to be in dark brown and I didn't bother buying one, but I think he's cute anyway.
I've also got a few more projects lying around that I haven't done anything with yet.
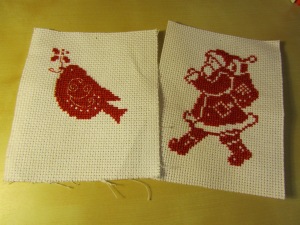
These ones are also from Cross Stitcher magazine (I really like that magazine. It's not all kittens and fairies). I did the bird on a train in Norway and the Santa in Evidence lectures last summer. I'm planning on putting them on Christmas aprons, I even bought the fabric last year but I ran out of time so I'd better find time this year.
This was my first go at sewing on evenweave instead of aida (nicer but more effort). There's a couple of mistakes in it, which makes me grumpy, but I'll cope. I thought I'd turn it into a Christmas decoration. The pattern is from Modern Folk on Etsy. I love all of their patterns and want to make them all, if only I had the time.
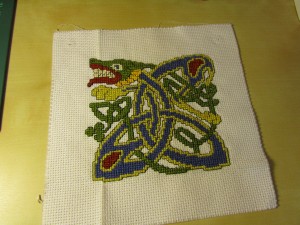
This one took me so long to do. Like, years. I bought the pattern in Scotland in, I think, 2007? I think I just found it boring to do with all the lines and it never seemed to get anywhere... But I'm really pleased with it now, so it was worth it. I think I'll frame it, the other suggestion was to make it into a pillow but I'm not brave enough to do that after the time it took to make. The pattern is from Textile Heritage - I've bought quite a lot of things from them on various trips the UK.
Craft Fair Goodies
This post was originally published on 9 September 2012
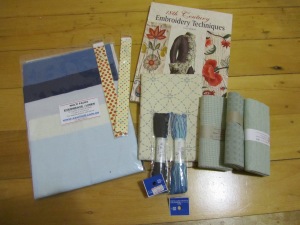
The craft fair was in Canberra a few weeks ago and, obviously, I went. It's good fun because there's so many different things so even though I could probably get most of the stuff online it's fun to browse. Much more variety than the few shops in Canberra. So this year's goodies included:
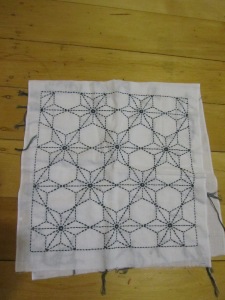
Packet of various types of linen and evenweave to try out (don't know the shop name), novelty zips, sashiko printed panel, sashiko thread and lovely japanese fabrics to edge the panel with and turn it into a table runner (from bebebold.com) and a book! 18th Century Embroidery Techniques, which I thought would be handy for working out how to do my pockets - I ordered a pattern from Nehelenia Patterns, which is nice but doesn't have much explanation of stitches or anything like that. The books looks really nice, I saw a review of it on American Duchess a while ago, and I agree with everything she said, if you're interested.
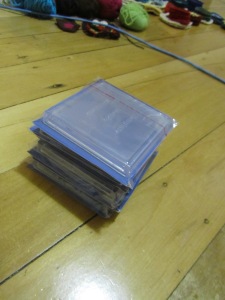
These are make-your-own plastic coasters. I have a plan for making some super cute cross stitch coasters. I don't know how pretty these will look, but it's probably a better option than sitting a mug directly on the cross stitch. Anyway, I'll see how it goes.
This is last year's craft fair purchase! I hadn't heard of sashiko before (Japanese embroidery) but I've always loved those geometric Japanese patterns (apparently originally derived from sashiko) so I decided to have a go. It's even easier than cross stitch (the kits come with pre-printed fabric) so it's a nice relaxing thing to do. My mum was pretty sceptical, Japanese isn't really her thing, but she came to the craft fair with me this year and now she's got her own sashiko project : )
Crochet!
This post was originally published on 5 September 2012
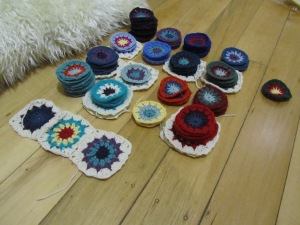
Here's a project I've been working on, on and off, for about a year now:
A saw a picture of one of these lovely 'circle in a square' afghans on Pinterest, and then I found this pattern, which is what I've been using.
The wool that I'm mostly using is Paton's Bluebell, which is 100% wool 5 ply crepe. It's beautiful wool to use and I know it lasts well (I have an orange cardigan my Mum made from it sometime in the 70s - can you spot the left over wool I'm using in the afghan?). It's kind of a silly project for me to be doing, since it would be good for using up little scraps of wool but I haven't really built up much of a wool collection so I've had to buy a lot of it. There's some odds and ends I got from my mother and grandmother, but since it's an unusual weight they didn't have that much. At least I got the cream wool cheap! It's also 100% wool 5 ply crepe but it's not Paton's so it was much cheaper ($2/ball?)
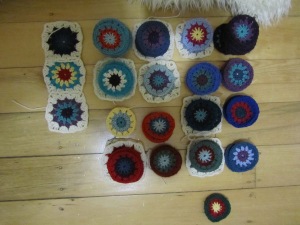
When I get enthused I can get quite a lot done pretty quickly but I keep getting distracted and putting it away for months at a time. Getting tendinitis didn't help either. At the moment I have 90 circles, so I'm somewhere between a half and two thirds done, depending on how giant I make it. I'm a bit worried I won't have enough cream wool to make it enormous though.
Oh, and when I started I was putting the cream borders around until I realised that it would be easier to link them up if I do all the cream at once. Then I did a few more cream bits to make sure I would be able to put them together, but I can and I think it'll look nice! My grandmother was very impressed that I won't have to sew lots and lots of squares together.
And then I was on Pinterest again and got distracted...
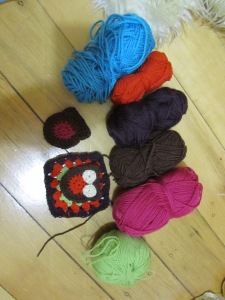
BUT LOOK CROCHETED OWLS
They are so cute and I couldn't resist them. I won't do a whole afghan of them, and I don't want to mix them in with my dignified, classy looking one, so I think I'll just do a cushion cover. And I in fact have three owls now, so it shouldn't take long, except that I was thinking of doing the back in cream, so I really need to wait and see if I actually have some left over from the afghan... Or buy more, if I can.
Oh, the colours I'm using for these ones are mostly a selection taken from the afghan ones (the pink and green are new so I haven't made any circles from them yet, but they'll be in there) except for the bright, shiny, acrylic blue. I kind of have in mind a cute fabric range that I'd like to make cushion from which has similar colours.
Regency Plans
This post was originally published on 30 August 2012.
I've been really busy with uni so, as usual, I've been procrastinating by making costuming plans without actually doing anything constructive. Since my 18th century plans are basically made and waiting on me finding time to carry them out, I've mainly been thinking about Regency.
I've got a couple of fabrics put away that I bought because I thought they might make good Regency things. The first is a printed quilting cotton in green and blue. I think the print is technically Civil War era and I know quilting cotton's a bit heavy, but I think it'll be good for a more practical day dress. I've been thinking that a drop-front gown could be a fun thing to try and it'll make it more practical, so that's the plan. I like this dress as a fairly plain drop-front with a gathered front and this one has really cool braided trim around the neckline, although it may not look as cool without stripes.
I also bought some white silk chiffon with little woven dots, which I think would make a fantastic evening dress but I'm having trouble coming up with something interesting to do with it. I'm not really into the super-decorated flouncy things from the later period, but it want it to be more exciting than just a white dress. So I have to think about that, but at least I know that I need to make a petticoat to go under the chiffon (which I could use for some of my other dresses).
Then, I don't remember why, but I was looking through a book I bought in Denmark about Louise Auguste, published by Rosenborg palace, which happens to have some very lovely extant regency-era costumes in it. In particular, it has two amazing silk velvet dresses. It also has a pattern diagram for one, though sadly it's for the one that I like less, but I'm thinking I could do something that uses the bodice and skirt of the one I like more and the sleeves of the one that has the pattern. It seems like the collection isn't online anywhere so I can't find any pictures except what's in the book... Anyway, I think it would be a really cool project, so we'll see how that goes.
And finally, since it looks like I'll be starting on a reasonable number of Regency projects, I think I might be weakening on the stays front. I've always been a bit worried about the 'regency stays will make you look like you have no bust' thing, but I'm feeling better after looking at lots of pictures of European royalty looking for pictures of those dresses. And short stays should be reasonably quick to make. And they can't be as slow and painful as the 1780s stays.
Elizabethan Partlet
This post was originally published on 19 August 2012.
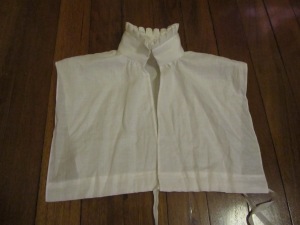
I took some time off from the stays this week to make myself an Elizabethan partlet. My Elizabethan outfit was my first proper historical costume (I made it in 2008) and I'd never got around to to making a partlet to go with it. I'd returned the one I'd borrowed so thought I'd better make my own in time for yesterday's Renaissance ball.
I wanted to use silk organza, but I've already started hemming the piece I have for an 18th century kerchief (not sure how that'll go, but that's a different story) so I didn't want to cut into that, and the shop that had some until recently seems to have run out. Frustrating! So I spent a couple of days stressing about that, until I decided to use a piece of silk/linen blend that I was planning to use for lining 18th century things, but I decided I can always get more when I finally get around to working on it. I was happy with that, in the end - it's nice and smooth, with the look of linen but a bit of sheen as well. It also creases really nicely, which was good for doing the collar.
It also took me longer than expected to find a pattern - I thought for something as simple as a partlet there must be a free pattern somewhere online, or in one of my books. Eventually I found this free pattern from Margo Anderson.
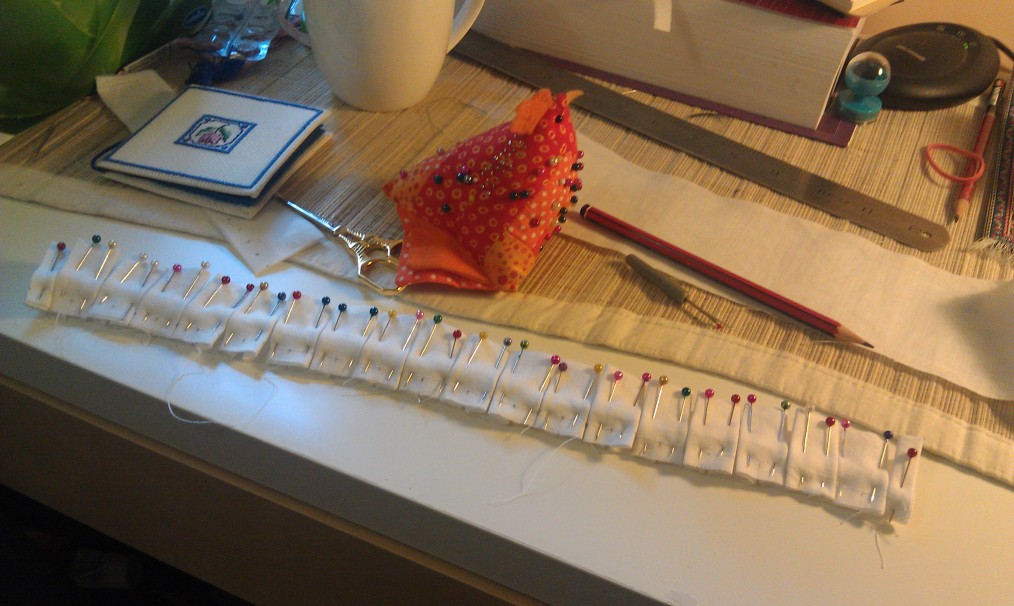
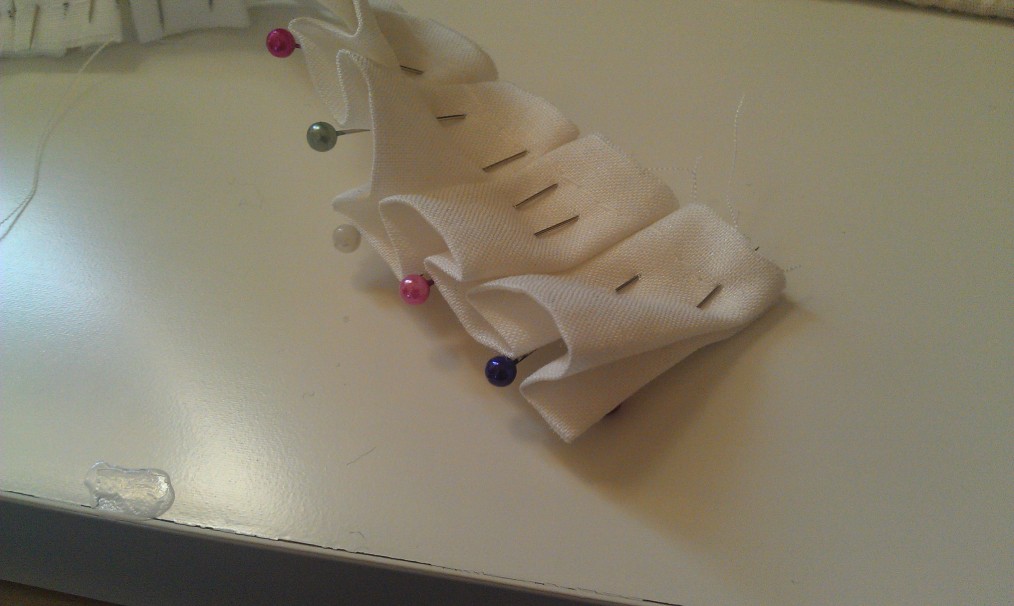
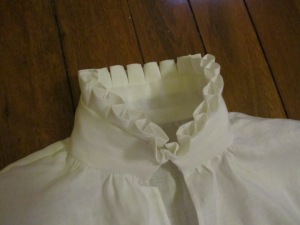
Once I found that, everything was pretty straightforward. The only change I made was to box-pleat rather than gather the frill at the top, which meant I could fold the piece over rather than hem it, and made it look more like a proto-ruff. I also chose to close the collar with hooks and thread loops rather than ribbon since my necklace is my favourite bit of my Elizabethan costume and I didn't want bits of ribbon getting in the way.
I also added some extra ribbon to the overskirt, which I shouldn't have done because I didn't really have time, but it turned out well. Wearing the outfit on the night, I was very happy with my overskirt and partlet, but was reminded that the bodice/sleeve situation is a bit of a nightmare, and I think I need to make new sleeves. And an underskirt at some point. I guess I'll ignore that for now and worry about it at the last minute before the next Renaissance event. Hmm.
And now I just have to clean up the debris of last-minute sewing and dressing. Yay.
Progress on the 1780s Stays
This post was originally published on 16 August 2012
After months of apathy (and a lot of non-sewing stuff going on), I'm finally getting on with my new set of 1780s stays. Here's what I've done:
Fitting: a few months ago I asked a friend who was briefly in Canberra to check the fit of my prototype. She suggested cutting the tab slits higher, bringing the front shoulder tabs in and altering the angle of the lacing at the back. I made all these changes to the prototype (had to cut yet more pieces for the front, grumble) and I think it went well, although the lacing at the back met, so it's possible that the angle still isn't ideal. On the final version I'm taking an inch off each piece so there will be a gap, so I'll have to see how it goes.
Oh, and I added some curve to the side-front seam of the piece since I've read (for example, from American Duchess) that this is how you get the more rounded line of the later decades, which sounds more flattering and more comfortable to me.
Materials: I've had a lot of trouble deciding on materials, but I've finally made some decisions. Ideally, I wanted to make the stays soft blue with pink trimming. I have some blue silk, but it's actually quite yellow-y and odd, so it really doesn't go with pink. Then I ordered some pink silk twill ribbon from etsy for binding, but when it arrived the colour turned out to be less rose pink and more salmon, so it needs a nice clear colour so that it doesn't just look brown. I was going through my silk collection and realised I have just enough ivory silk dupion left over from binding the last set of stays and it looks OK with the silk ribbon. I also managed to find some pink silk thread that goes well enough, so it looks like the stays will be ivory with pink stitching and bound with ribbon.
For the interlining fabrics, I'm using a layer of beige-y cotton/linen and yellow cotton canvas. Finding pure linen fabrics without stretch was basically impossible, and I think the final effect will be the same. Also, I'm hoping that only having one layer of canvas will make the stays more forgiving and curvy than the last set, which had 2.
If I put in a lining, I'll do it at the end. I have some reasonably soft pale blue linen that I can use.
Boning: I've still got German synthetic whalebone from the last stays so hopefully there will be enough. In terms of arranging the boning, I think I'll look at these stays from the V&A, this pattern from JP Ryan, these amazing stays, and the Butterick pattern I've been using. I'm starting with bones along the seam lines.
Cutting out: I've traced the outline (without seam allowance) of each piece onto the silk and then cut out them out of all layers, leaving plenty of spare fabric all around the lines. Then I basted around the outline through all three layers.
Construction: I've started sewing the boning channels. I'm sewing by hand, using backstitch. I'm not sure how that'll go, it's much slower than machine, but it does give me more control - doing channels by machine, I often had to undo them if it got wonky, or I realised that it was slightly too tight for the bone - by hand I can check these things as I'm going, instead of unpicking the whole thing and starting again! It also means that I can do a seam or two at a time, watching tv or while I'm at uni.
Then once I've done the channels, I'm planning on whipping the edges of the pieces together.
Anyway! Progress. I think it's going well.
Adventures in Patterns
This post was originally published on 24 May 2012.
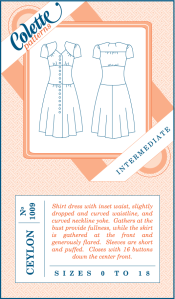
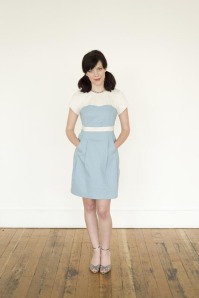
I've only just started venturing into independent modern pattern companies. I'd seen the Colette patterns at the local fabric shop but wasn't sure how good they'd look from looking at the illustrations. Then I saw some pictures online and decided to give them a go. I even found some perfect fabric (on sale!) to do a Rooibos, but I when went to to the shop the only dress pattern they had was Ceylon. I decided to try it anyway, which was possibly not the best idea, given how many pieces it has - it probably wasn't going to be that quick to whip up just to see how I like the pattern company.
However! All went well. I love the cute booklet and the clear instructions. The slightly unusual construction of the yoke went together beautifully and the finished product is comfortable and flattering. I now know which sizes fit me and that I can probably get away with less fabric than the pattern says.
So now I want more! But where to start?
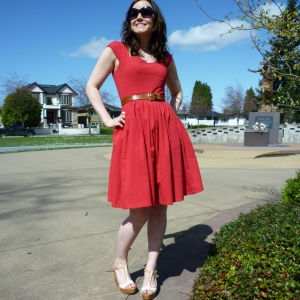
- I already have the fabric for Rooibos
- Macaron looks really sweet, though it seems like finding a perfect mix of fabrics is hard
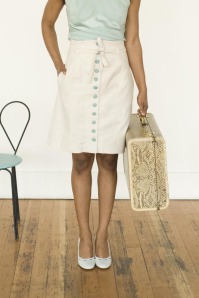
- The Beignet skirt looks really versatile and a good change from dresses
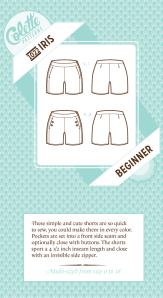
- I want some high-waisted shorts like Iris (though I don't need them, having bought 3 pairs of shorts last summer...)
I wasn't that inspired by the Sewaholic patterns - Lonsdale is a bit angular for me, and I'm not that enthused by sewing tops. But the other day I saw the Cambie dress and I LOVE it, so I'm very willing to be converted.
And on top of those...
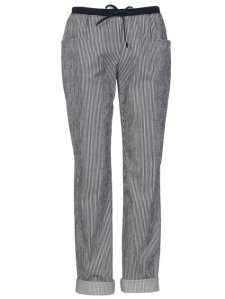
I want some lightweight pants for our trip to Turkey, so I should start that.
I also have some Liberty fabric to do a skirt, plus a couple more pieces I haven't decided what to do with.
Plus I love this patttern.
And this dress, which could work with the Burda pattern I've used a few times.
Oh, and this dress.
Not enough time! So many patterns to buy, and make!
Making it Work: Fabric
I was taught to sew by my mother and grandmother, who, to varying degrees, belong to a generation for whom sewing your own clothes was cheaper than buying them. That has certainly never been the case for me, though the two are becoming more comparable thanks to the advent of internet shopping. Still, their thrifty habits taught me a couple of things:
- You never need as much fabric as the pattern says
- If you don't have quite as much fabric as you need, or it's not quite right, you can always make it work.
Working in a fabric shop, I always find it hilarious when people say "The patterns says I need 1.5m. I'll get 2.5m just in case". I guess it's good if you're not confident - I'm so paranoid cutting things out I rarely get it wrong.
This attitude has certainly saved me money, but it's also got me into some tricky situations. Usually I'd get 0.1 or 0.2m less than the pattern says. But on one occasion a couple of years ago, I went a bit overboard with a Regency day dress. The pattern said something like 4.5m, I decided 4 was OK (having used the pattern before), then they unrolled the fabric I chose... and there was only 3m left. So I said "we can make it work!". And, eventually, we did, after a lot of fiddling. Of course, I'd also managed to chose a fabric with stripes.
When I decided to try out Colette's Ceylon pattern, I couldn't find any fabric I was happy with in the shop and I couldn't quite believe I needed 3.5m. Although, not having used Colette before, I didn't know how much leeway I had. In the end, I dug out a piece of cotton poplin I'd got from work which had come out OK after a turn in the washing machine. So it turned out I had 2.6m of 115cm wide fabric and it had some holes along one side where it had been stapled to a table, just to make things more interesting.
In the end, it worked. I avoided the holes and the only pieces I had to put across- rather than length-wise were the front facings. The moral of the story is: you can make a Ceylon from 2.6m of fabric, but only if you want to muck around for hours and cut it out piece by piece. I think I'll be getting at least 3m for my next Ceylon!
Blue Poplin Burda Dress
Pattern: BurdaStyle 02/2011 #104
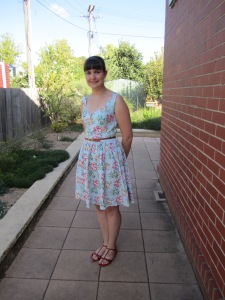
This was my first attempt at this pattern (later used in the London-Delft dress) which I made last year. I cut a size 40 but I think I should've cut a 38 - I took it in at the sides and kept having to cut the armholes deeper as they cut in at the front every time I tried to move my arms. I added a waistband because I thought the bodice looked rather short, then realised it looked terrible with the extra length. So I kept the waistband, but this time I just laid it on top of the existing bodice. So it may look like it has an extra piece, but it isn't really functional. It adds some extra definition to the waist though, which is nice. I think the skirt might have more fabric in it than it's meant to - I just used the whole width. Anyway, I'm very happy with this dress : )
Babushka Sewing Bag
This post was originally published on 18 April 2012.
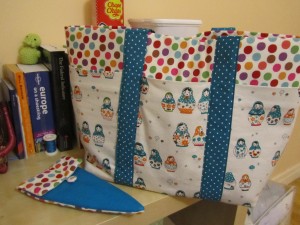
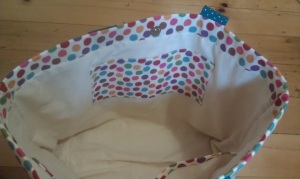
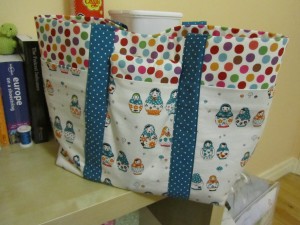
Here's another project I did in the last few months: a sewing bag made from adorable babushka fabric.
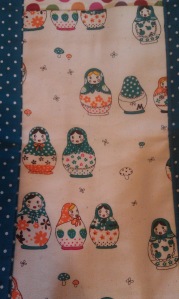
I found the gorgeous babushka fabric at the craft fair and knew I needed some. It's actually printed cotton drill, so it's a good weight for a bag. Then I came across this pattern and went looking for some matching fabrics. I love the turquoise, I wasn't super happy with the spots but I like them now. They look like smarties : )
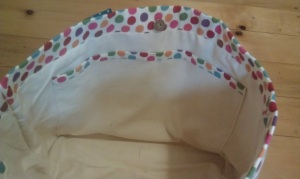
After I'd bought the fabric I looked at the finished dimensions: 8 x 10 x 4 inches. That seemed a bit small, so I decided to multiply all the measurements by 1.5 so it would be a bit bigger. Then, of course, I didn't have quite enough fabric so I lined the bag with calico, which actually turned out well because now the interior is bright and unfussy, so it's easy to find things. Then I spent the whole process worried that it would turn out absurdly huge, but once I did the mitred corners (is that the word I'm looking for?) I decided it was exactly the right size. I put in a pocket in the side which fits A4 paper perfectly.
I also added a small pocket on the other side for small bits and pieces, like a needlebook, thread scissors, unpicker and tape measure.
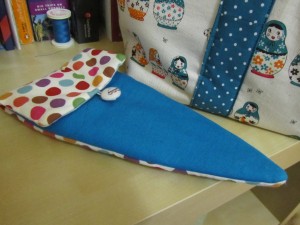
I'm really happy with this bag! I use it to keep current projects in, so they're easy to transport if I'm moving around to sew. There are lots of different pockets for all my tools and if I'm organised and remember to put them back when I'm finished I can always find them! I also made a little matching case for my scissors, so the sharp point is protected and won't damage the bag.
'Babushka' is a funny word, isn't it? I find Australians usually say 'Babushka' but other people say 'Matryoshka'. I've heard that 'Babushka' is inappropriate, but wikipedia doesn't think that's true. It's just... different to everyone else. Anyway, I usually stick with 'Babushka' because, well, it's what I've always said.
The London-Delft Dress
I've been following The Sew Weekly closely for the last few months. I haven't joined it (I can't sew something every week and I'm not sure how it all works anyway) but I really like the idea of the weekly themes. They've been making me think more creatively about my projects and their back stories, but not enough for me to actually finish anything coordinated with the themes... But this week I finally finished something that does fit in with a theme! And it's only a day late!
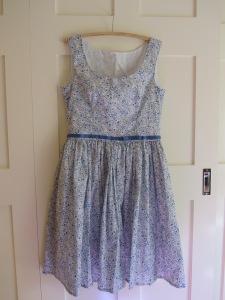
Fabric: Lillian's Berries Tana Lawn from Liberty of London, bodice and skirt lined with white cotton voile.
Pattern: BurdaStyle 02/2011 #104
I remember when I was growing up hearing 'Liberty' fabric mentioned, and my Mum had a few pieces in the cupboard which I knew I wasn't allowed to use, but I don't think I really understood what made it special. Then when I was studying in Denmark we finally managed to make it to London for a few days and I saw the Liberty shop marked on the map and decided to check it out. I think during the 5 day trip I managed to drag us back another 2 times, and I've basically been obsessed since then. The fabric was all so beautiful but rather pricey, so I decided I could get enough for one dress as a special London souvenir. Given how much it costs elsewhere, as I've since discovered, I wish I'd bought more!
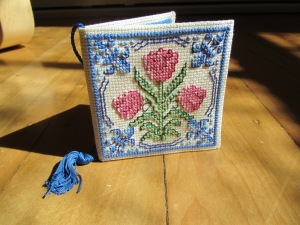
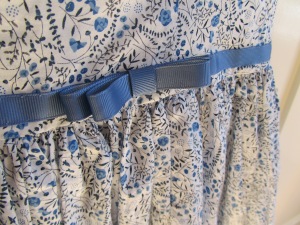
I was really torn on which fabric to choose and I didn't have a particular project in mind. Eventually I settled on this one because the simple blue and white colour scheme reminded me of Delft tiles. I'd spent a very pleasant afternoon in Delft a few years before and had been a Vermeer/Girl with a Pearl Earring fan for a few years before that. I also bought a Delft tile cross stitch pattern at Liberty the same day. I don't know why my mind was making the connection that day but anyway, it was. Once I finished the dress I felt it just needed a little something to accent it a bit so I got some matching blue grosgrain ribbon, which I think turned out beautifully.
As for the pattern: I've made this pattern twice before (more on that later) and each time I've got the fit a little better, so hopefully it's pretty good on this one! As in the last version I didn't cut the bodice on the cross as recommended because it takes more fabric. I think it's fine like this. I added a lining to the skirt, just a rectangle but less gathered than the main skirt. The skirt itself uses more fabric than the pattern recommends - Liberty fabric comes about 135cm wide so I used the whole width. The ribbon sash sits just above the waist seam and I added a little double bow for some subtle girliness (in case this dress needed to be more girly).
I decided to use this pattern because it's fairly classic - it can be casual or dressy and hopefully I won't hate it in 10 years time. Also the skirt pieces are just big rectangles, so if I do I can always pull it apart!
Then last night I thought of a really good way to do a dress representing Canberra, my home city. But I'll have to order the fabric. Oh well, that's another project...
1780s Ikea Gown
This is an amalgamation of earlier posts from 2011-2012, cutting out the musing and missteps...
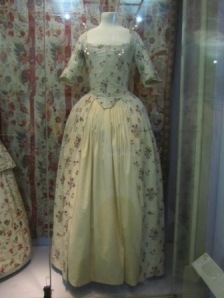
The first C18th dress I chose to do was a chintz day dress. I saw a few that I loved in this style in Europe, such as this one from the V&A.
I bought Ikea doona cover to use as the main fabric. In fact I’ve got 2, because I liked it so much I decided I wanted one to use as a doona cover as well. The advantages of this fabric are that it was cheap and the fabric is quite soft, unlike quilting fabrics. For a modern fabric I think the pattern is reasonably authentic. I quickly discovered that of course LOTS of people have bought exactly the same thing to make historic costumes, including two other Canberrans, but you can't have everything.
I decided to make two petticoats, one from plain white voile and another from an embroidered muslin I bought from Clegs in Melbourne.
I originally planned to use Sense & Sensibility’s Portrait Dress pattern. However, I needed to add length to the bodice and there was no lengthening line at the waist, so I used the JP Ryan Robe à l'Anglaise pattern instead (much simpler than mucking around with curves and things). I then adjusted that pattern by cutting the armscyes deeper and adjusting the angle of the shoulder straps (I had considerable help at this point, during a costuming weekend in September 2011)
Progress then took a considerable hiatus as on that weekend I discovered that I hated the C18th stays I'd just so lovingly finished. They were painful, made me want to pass out, and didn't get the right shape anyway. So I had to make a new set of stays before I could get on with the gown. Coincidentally, I swore never to make more C18th stays at that point, but I caved eventually.
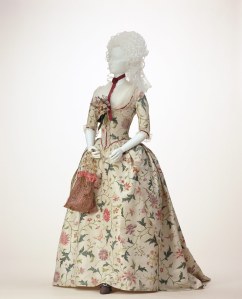
I loved the trimming on this dress, from the Kyoto Costume Institute and I may still use this as inspiration in the future, but I didn't get time to do anything like this and I don't think it needs it.
I also bought a couple of metres of very beautiful, wide lace to trim the cuffs with. Many dresses and patterns have more shaped cuffs but I think just lace is acceptable for this later 1780-1795 date.
Subscribe to:
Posts (Atom)


