Showing posts with label 18th Century. Show all posts

Friday, June 14, 2013

Silk Mitts


A couple of weeks ago I finished off these C18th/Regency silk mitts.  I've been collecting pictures of late eighteenth century mitts on Pinterest for a while so I decided to make some up before this year's Jane Austen Festival in April.  They were mostly finished for the event so I wore them but I didn't get around to doing the embroidery until the end of May.

I love my mitts! They're much prettier and more practical than gloves - good for sewing workshops when you want to be able to use your fingers.  Most mitts in museums are dated late eighteenth century so they go with my Ikea dress but apparently they continued to be worn in the Regency period, so that suits me well! I think there will be more mitts in my future.

I used this pattern. I found it on Pinterest, I'm not sure where it's from but I just printed it out full size (cut in half on two A4 sheets). I was going to use the one in Costume Close Up but printing this one seemed easier than scanning, resizing, etc. I just made them the original size from the image. The calico one I did to test the pattern fit me really well but the silk I used for the real ones was stiffer so they're a little bit snug - the side seam on the right hand one is almost pulling through, so next time I need to use a bigger seam allowance.

I used some silk dupion from my stash. The main fabric is an odd blue/yellow-green shot mix that I've never known what to do with but the colour looks nice in this. I lined the points with gold silk dupion. I think I'll make a matching reticule at some point. Silk taffeta or satin would be more accurate but this was the first pair I tried and I wanted to use something I already had. I think I'll make another pair in satin or taffeta soon, with a bigger seam allowance so they don't break! A lot of extant mitts also seem to be lined (often with leather) so maybe I'll add a lining in the future. I thought I could add it to these ones at some point but not if they're already tight!


I stitched the side seam and the point by machine but everything else is done by hand. For the hems I used a tiny spaced backstitch and used threads pulled from the leftover fabric, which I'm quite proud of. I embroidered the lines on the back of the hand with blue silk thread, using herringbone stitch and chain stitch. Many mitts also have herringbone stitch around the thumb and point so I may do that at some point but I shouldn't be doing more embroidery than I have to at the moment, with my hands/arms still being sore. Sigh.

Thursday, May 2, 2013

Craft Fair Goodies


This post was originally published on 9 September 2012

The craft fair was in Canberra a few weeks ago and, obviously, I went. It's good fun because there's so many different things so even though I could probably get most of the stuff online it's fun to browse. Much more variety than the few shops in Canberra.  So this year's goodies included:
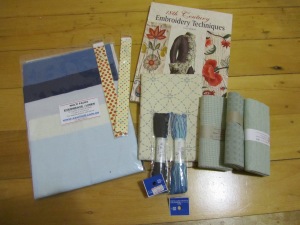
Packet of various types of linen and evenweave to try out (don't know the shop name), novelty zips, sashiko printed panel, sashiko thread and lovely japanese fabrics to edge the panel with and turn it into a table runner (from bebebold.com) and a book! 18th Century Embroidery Techniques, which I thought would be handy for working out how to do my pockets - I ordered a pattern from Nehelenia Patterns, which is nice but doesn't have much explanation of stitches or anything like that.  The books looks really nice, I saw a review of it on American Duchess a while ago, and I agree with everything she said, if you're interested.
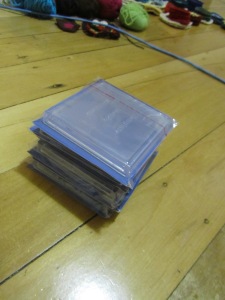
These are make-your-own plastic coasters.  I have a plan for making some super cute cross stitch coasters. I don't know how pretty these will look, but it's probably a better option than sitting a mug directly on the cross stitch.  Anyway, I'll see how it goes.
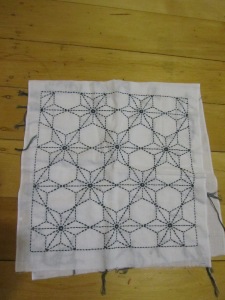
This is last year's craft fair purchase! I hadn't heard of sashiko before (Japanese embroidery) but I've always loved those geometric Japanese patterns (apparently originally derived from sashiko) so I decided to have a go.  It's even easier than cross stitch (the kits come with pre-printed fabric) so it's a nice relaxing thing to do.  My mum was pretty sceptical, Japanese isn't really her thing, but she came to the craft fair with me this year and now she's got her own sashiko project : )

Progress on the 1780s Stays

This post was originally published on 16 August 2012


After months of apathy (and a lot of non-sewing stuff going on), I'm finally getting on with my new set of 1780s stays.  Here's what I've done:

Fitting: a few months ago I asked a friend who was briefly in Canberra to check the fit of my prototype.  She suggested cutting the tab slits higher, bringing the front shoulder tabs in and altering the angle of the lacing at the back.  I made all these changes to the prototype (had to cut yet more pieces for the front, grumble) and I think it went well, although the lacing at the back met, so it's possible that the angle still isn't ideal. On the final version I'm taking an inch off each piece so there will be a gap, so I'll have to see how it goes.

Oh, and I added some curve to the side-front seam of the piece since I've read (for example, from American Duchess) that this is how you get the more rounded line of the later decades, which sounds more flattering and more comfortable to me.

Materials:  I've had a lot of trouble deciding on materials, but I've finally made some decisions.  Ideally, I wanted to make the stays soft blue with pink trimming. I have some blue silk, but it's actually quite yellow-y and odd, so it really doesn't go with pink.  Then I ordered some pink silk twill ribbon from etsy for binding, but when it arrived the colour turned out to be less rose pink and more salmon, so it needs a nice clear colour so that it doesn't just look brown. I was going through my silk collection and realised I have just enough ivory silk dupion left over from binding the last set of stays and it looks OK with the silk ribbon.  I also managed to find some pink silk thread that goes well enough, so it looks like the stays will be ivory with pink stitching and bound with ribbon.

For the interlining fabrics, I'm using a layer of beige-y cotton/linen and yellow cotton canvas. Finding pure linen fabrics without stretch was basically impossible, and I think the final effect will be the same.  Also, I'm hoping that only having one layer of canvas will make the stays more forgiving and curvy than the last set, which had 2.

If I put in a lining, I'll do it at the end. I have some reasonably soft pale blue linen that I can use.

Boning: I've still got German synthetic whalebone from the last stays so hopefully there will be enough.  In terms of arranging the boning, I think I'll look at these stays from the V&A, this pattern from JP Ryan, these amazing stays, and the Butterick pattern I've been using. I'm starting with bones along the seam lines.
Tracing around the prototype pieces
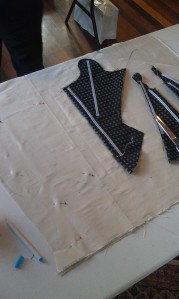
Cutting out: I've traced the outline (without seam allowance) of each piece onto the silk and then cut out them out of all layers, leaving plenty of spare fabric all around the lines.  Then I basted around the outline through all three layers.
Outline traced in water-soluble pen
Construction: I've started sewing the boning channels. I'm sewing by hand, using backstitch.  I'm not sure how that'll go, it's much slower than machine, but it does give me more control - doing channels by machine, I often had to undo them if it got wonky, or I realised that it was slightly too tight for the bone - by hand I can check these things as I'm going, instead of unpicking the whole thing and starting again! It also means that I can do a seam or two at a time, watching tv or while I'm at uni.

Then once I've done the channels, I'm planning on whipping the edges of the pieces together.
Anyway! Progress.  I think it's going well.

1780s Ikea Gown

This is an amalgamation of earlier posts from 2011-2012, cutting out the musing and missteps...


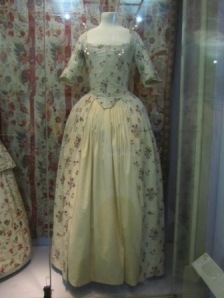
The first C18th dress I chose to do was a chintz day dress.  I saw a few that I loved in this style in Europe, such as this one from the V&A.
I bought Ikea doona cover to use as the main fabric.  In fact I’ve got 2, because I liked it so much I decided I wanted one to use as a doona cover as well.  The advantages of this fabric are that it was cheap and the fabric is quite soft, unlike quilting fabrics.  For a modern fabric I think the pattern is reasonably authentic.  I quickly discovered that of course LOTS of people have bought exactly the same thing to make historic costumes, including two other Canberrans, but you can't have everything.  

I decided to make two petticoats, one from plain white voile and another from an embroidered muslin I bought from Clegs in Melbourne. 

I originally planned to use Sense & Sensibility’s Portrait Dress pattern.  However, I needed to add length to the bodice and there was no lengthening line at the waist, so I used the JP Ryan Robe à l'Anglaise pattern instead (much simpler than mucking around with curves and things).  I then adjusted that pattern by cutting the armscyes deeper and adjusting the angle of the shoulder straps (I had considerable help at this point, during a costuming weekend in September 2011)

Progress then took a considerable hiatus as on that weekend I discovered that I hated the C18th stays I'd just so lovingly finished.  They were painful, made me want to pass out, and didn't get the right shape anyway.  So I had to make a new set of stays before I could get on with the gown. Coincidentally, I swore never to make more C18th stays at that point, but I caved eventually. 

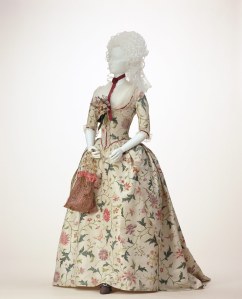
I loved the trimming on this dress, from the Kyoto Costume Institute and I may still use this as inspiration in the future, but I didn't get time to do anything like this and I don't think it needs it.
I also bought a couple of metres of very beautiful, wide lace to trim the cuffs with.  Many dresses and patterns have more shaped cuffs but I think just lace is acceptable for this later 1780-1795 date.

18th Century Plans

This post was first published 16 March2011

While in Europe in the second half of last year I made it to as many costume museums as I could (given the rarity of such places in Australia).  I saw lots of gorgeous things, but I found that the period that was appealing to me most was the late 18th century.  Re-watching The Duchess and Marie Antoinette helped, too.  It's a bit odd, since I previously thought the period was mostly just weird and artificial looking, but now I think it's awesome.  I think it could have a lot to do with pretty fabrics, stripes and ruffles.  At this stage I'm definitely leaning towards the last couple of decades of the century as I haven't been feeling like too much frilliness and panniers, and the construction seems more straightforward.  Well, we'll see how we go, maybe I'll be able to ease myself into the more outlandish styles gradually.

Of the museums I went to, I think I enjoyed the Brede Vaerk Museum in Copenhagen the most - lots of gorgeous costumes, and well displayed.  We managed to fit in a trip to London for 5 days and I was really looking forward to going to the V&A (I'd been before, but before I was really into costuming) only to discover when we arrived that the fashion section was closed for renovation.  Serves me right, I'm sure I could've found that out before we went.  But there were still a couple of gorgeous chintz dresses out.  The Museum of London had a great exhibition on, which I think I'd even read about before we left, with 18th and 19th century garments displayed with modern millinery.  It was very cool, although the display was a bit frustrating since it was quite dark and you couldn't see back views or anything.  Anyway, some of the photos I took are on flickr but I should put more up, too.